From Design to Deployment: How Celina Is Building a Fully Automated Network
This post builds on Building a Future-Proof Municipal Network: Celina's Journey to Modern Infrastructure. If you haven't read that yet, it provides helpful context for what follows.

In my last post, I outlined the next steps for Celina's network. Now let's dig deeper — what those steps look like, and how we're getting there. From the outset, we knew we weren't going to reinvent the wheel. We're a small shop, and the best option for us is to build on the investments Arista has made around automation.
What Is Arista Validated Design?
The first step in our journey was aligning our network to an Arista Validated Design (AVD). But what exactly is AVD?
At its core, AVD is a data model built on foundational networking principles. It defines how your switches connect, builds topology based on standardized designs, and generates configurations rooted in Arista best practices. The result is an optimized, consistent, and fully supported network environment.
AVD was originally designed and delivered through the Ansible Automation Platform. Ansible is an industry standard for automation but requires specialized skills to set up and operate. For a team like ours, where most people are already wearing two or three hats, that kind of deep Ansible expertise simply isn't realistic to develop in-house.
Enter CloudVision Studios
Arista CloudVision Studios changes the equation entirely.
Studios bring the power of AVD directly into CloudVision, abstracting away the need for a separate automation platform and replacing YAML file configuration with a clean, web-based interface. Because Studios is built on AVD, it inherits the same data model and design principles — just with a dramatically lower barrier to entry.
Studios allow our network engineers to implement meaningful automation without becoming an automation specialist.
- Consistency across your entire environment
- Configuration management that is secure, validated, and supported
- Reduced outages and errors through built-in validation checks
- Minimized human error at every step
- A fully supported design — when you call Arista TAC, they know your topology immediately
That last point matters more than people often realize. When your network follows a validated design, your support team isn't walking into a black box. They know where to look, they know the common failure points, and they resolve issues faster.
Choosing the Right Design
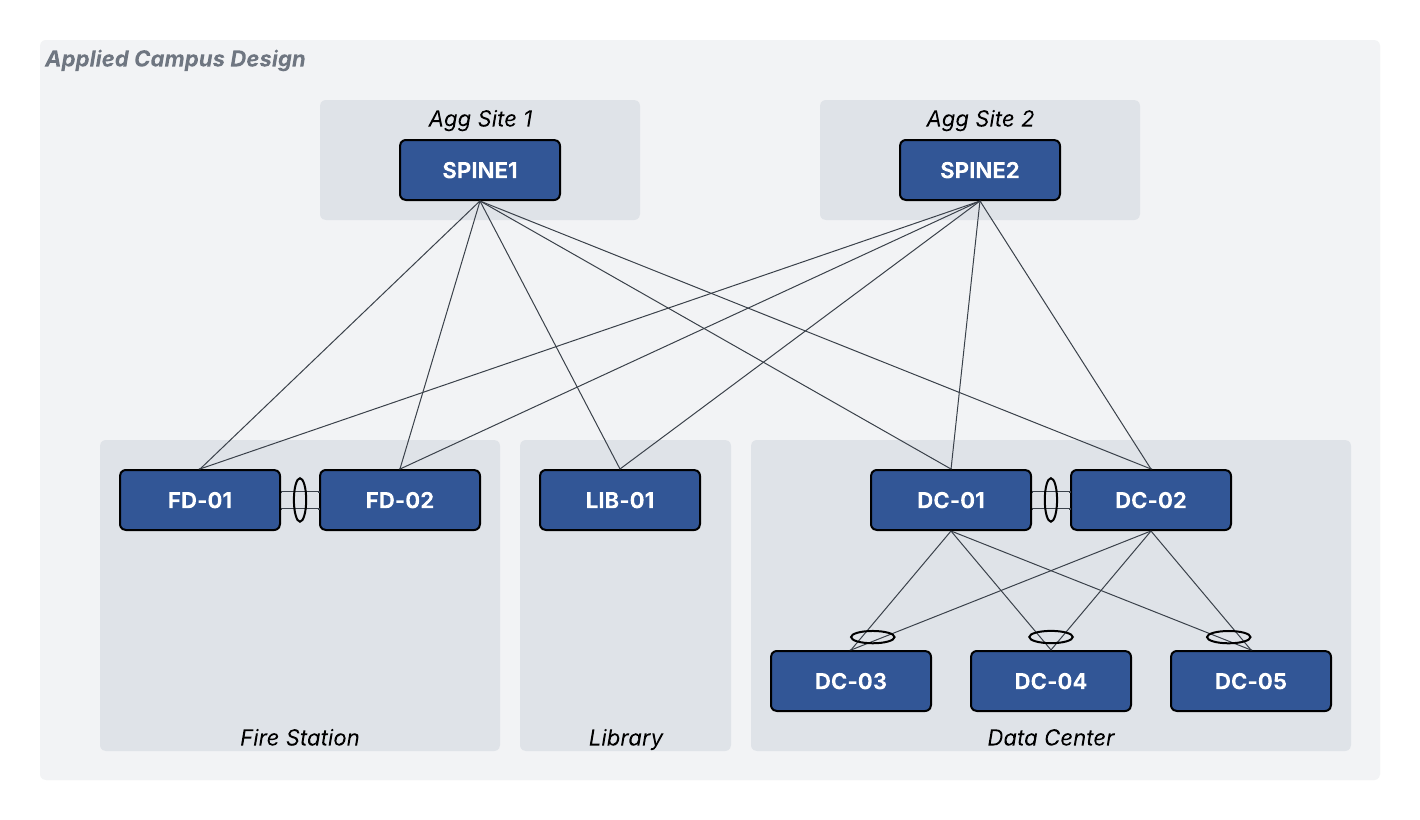
After a thorough review of the Arista Universal Cloud Network for Campus guide and a group engineering session with our SE team and several sister cities, we landed on a hybrid L3/L2-Leaf Spine architecture. This design breaks the layer 2 domain at the edge of each site and allows us to leverage network overlays like VXLAN/EVPN.
The idea is to treat network aggregation as the campus spine level, with a pair of Layer 3 leafs deployed at each site. Larger sites then have Layer 2 leafs beneath those campus leafs. This approach gave us the right balance of availability and configuration simplicity.
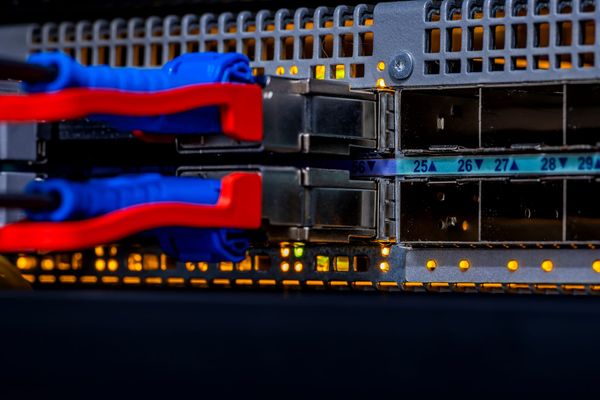
This is also where DWDM plays a critical role — as I covered in my previous post, DWDM allowed Celina to use significantly less physical fiber while still achieving the high number of point-to-point links this design requires.
Planning the Deployment
Once we had a design, we needed a deployment strategy. Working closely with Arista's professional services team, we determined that the best approach for our brownfield environment was to write and apply configurations manually using the static configuration studio first, then migrate to a campus studio.
The reason: we have to keep the network operational with minimal disruption. We also needed to reach the new configuration state quickly. Not just for the technical benefits, but because network availability is a very real operational challenge for us. I spent much of my first 18 months at Celina in reactive mode: power outages causing cascading network issues, limited access to servers and services, staff unable to serve residents. We needed a backbone resilient enough to absorb whatever comes our way — from power failures to forced equipment relocations to unplanned fiber cuts.
Building that resilience into our core was the priority.
How We Mapped the Design to CloudVision Studios
We selected the Campus Fabric (L2/L3/EVPN) studio, which supported the architecture we were going for. That said, the studio's language is built around traditional campus environments, so we had to think creatively about how to map Celina's infrastructure to those definitions.
Here's how we translated it:
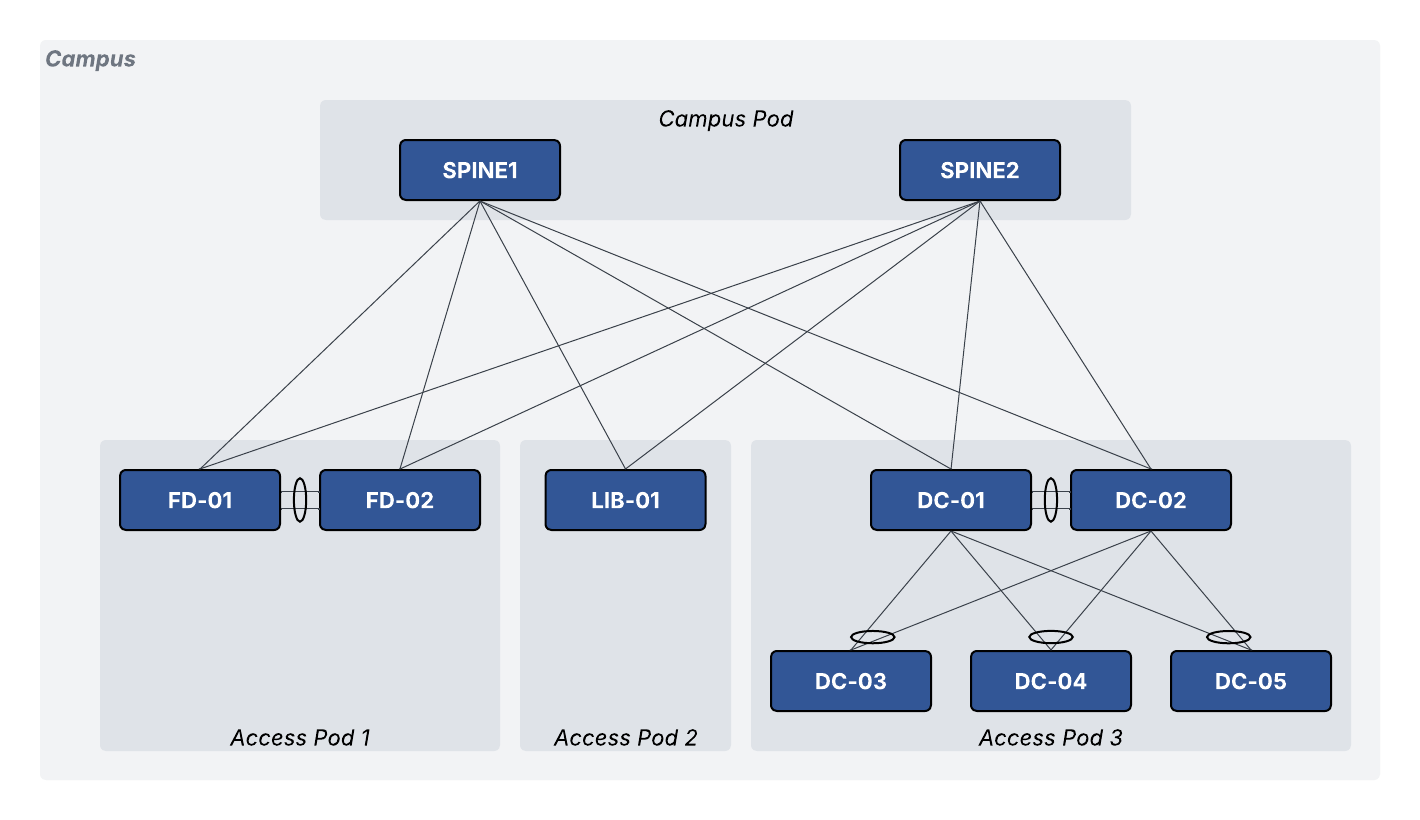
Campus — We define a Campus as a network segmentation: Traffic, Enterprise, SCADA, and so on. No devices are directly assigned at this level. Think of it as the logical container.
Campus Pod — This maps to our aggregation layer, or hub sites. We typically have two hub sites that serve as the connection points for our physical fiber ring. The design ensures that if one hub site goes down, all other sites continue operating uninterrupted with sub-second failover.
Access Pod — These are our networked locations. Each location has one or two core switches connected to the fiber ring, acting as Layer 3 leafs to the pod. Larger sites have multiple Layer 2 switches beneath them.
Where We Are Today
We're actively working toward a fully CloudVision Studios-managed network, and we've already completed several successful greenfield deployments. We're closer than we've ever been to having the entire environment automated — and we're burning the midnight oil to finish the job.
The vision is clear: a consistent, resilient, fully automated municipal network that lets our team spend less time firefighting and more time building for Celina's future.